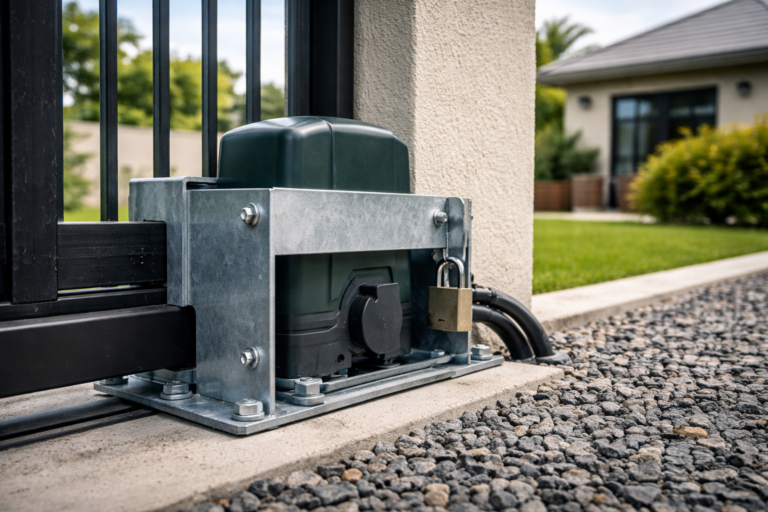
Gate Motor Installation 101: Everything You Need to Know Before You Start
Introduction to Gate Motor Installation
So, you’re thinking about upgrading your home’s security and convenience with a gate motor? Excellent choice! Gate motors aren’t just a luxury; they’re a practical addition that can enhance your home’s security and streamline your daily routine. But before you dive into the world of gate motor installation, let’s break down everything you need to know to make the process smooth and hassle-free.
Why Gate Motors Are Essential for Modern Homes
Picture this: you’re coming home after a long day, and all you want is to get inside without having to jump out of the car to open the gate. That’s where gate motors come in. They automate the process, giving you convenience and an extra layer of security. With a gate motor, you can control access to your property from the comfort of your vehicle, and that’s just the beginning.
Benefits of Installing a Gate Motor
Installing a gate motor doesn’t just make life easier; it also boosts security. Imagine being able to control who enters your property with a remote or even from your smartphone. Gate motors can be a game-changer, providing you with peace of mind and adding value to your property.
Types of Gate Motors
Choosing the right gate motor can be overwhelming with so many options available. Let’s break down the different types to help you find the perfect fit for your needs.
Sliding Gate Motors
Sliding gate motors are perfect for gates that slide horizontally. They’re a popular choice due to their durability and smooth operation. If you have a large, heavy gate, a sliding gate motor could be just what you need.
Swing Gate Motors
If you have a traditional gate that swings open, a swing gate motor might be the way to go. These motors are designed to handle gates that move in an arc, and they come in various sizes to accommodate different gate weights.
Underground Gate Motors
For a more discreet option, underground gate motors are installed beneath the gate, making them virtually invisible. They’re a great choice if you want to maintain the aesthetic appeal of your gate without sacrificing functionality.
Hydraulic Gate Motors
Hydraulic gate motors are known for their strength and reliability. They use hydraulic fluid to power the gate’s movement, making them ideal for heavy-duty gates that require extra power.
Choosing the Right Gate Motor for Your Needs
Now that you’re familiar with the different types of gate motors, it’s time to choose the right one for your needs. Consider the following factors:
Factors to Consider
Gate Size and Weight
The size and weight of your gate are crucial in determining the right motor. Heavier gates will require more powerful motors to ensure smooth operation.
Frequency of Use
Think about how often you’ll be using the gate. If it’s a high-traffic gate, you’ll need a motor designed to handle frequent use.
Power Supply and Voltage
Ensure that the gate motor you choose is compatible with your home’s power supply. Check the voltage requirements to avoid any electrical issues.
Comparing Brands and Models
With so many brands and models available, it’s important to do your research. Look for reputable brands with positive reviews and compare features to find the best fit for your gate.
Preparing for Installation
Before you start the installation process, there are a few things you need to prepare.
Tools and Materials Needed
Make sure you have all the necessary tools and materials before you begin. This includes a drill, screwdriver, wire cutters, and the motor itself. Having everything on hand will make the installation process smoother.
Measuring and Assessing Your Gate
Accurate measurements are crucial for a successful installation. Measure your gate carefully to ensure that the motor you choose will fit properly and operate smoothly.
Understanding Local Regulations and Permits
Check with your local authorities to see if you need any permits for installing a gate motor. Compliance with local regulations is important to avoid any legal issues.
Installation Steps for Sliding Gate Motors
Ready to get your hands dirty? Here’s a step-by-step guide to installing a sliding gate motor.
Preparing the Gate and Track
Start by preparing the gate and track. Make sure the track is clean and free of debris, and ensure that the gate is properly aligned.
Installing the Motor Unit
Follow the manufacturer’s instructions to install the motor unit. This typically involves mounting the motor on a solid base and connecting it to the gate’s track.
Wiring and Electrical Connections
Carefully wire the motor according to the instructions. Ensure that all connections are secure and that the power supply is properly connected.
Testing and Adjustments
Once the installation is complete, test the gate motor to ensure it’s working correctly. Make any necessary adjustments to the motor’s settings for optimal performance.
Installation Steps for Swing Gate Motors
For those with swing gates, follow these steps to install a swing gate motor.
Preparing the Gate and Hinges
Check the hinges and ensure that they’re in good condition. Lubricate them if necessary to ensure smooth operation.
Mounting the Motor
Mount the motor according to the manufacturer’s instructions. This usually involves securing the motor to a post or wall near the gate.
Wiring and Electrical Connections
Connect the motor to the power supply and make sure all electrical connections are secure. Follow the instructions carefully to avoid any electrical issues.
Testing and Adjustments
Test the motor to ensure it’s operating correctly. Make any necessary adjustments to the motor’s settings for smooth and reliable operation.
Installation Steps for Underground Gate Motors
Installing underground gate motors requires a bit more effort, but the results are worth it.
Excavation and Preparation
Begin by excavating the area where the motor will be installed. Make sure the hole is deep enough to accommodate the motor and its components.
Installing the Motor
Place the motor in the hole and secure it according to the manufacturer’s instructions. Ensure that the motor is level and properly aligned with the gate.
Wiring and Electrical Connections
Connect the motor to the power supply and make sure all wiring is secure. Carefully follow the instructions to avoid any electrical issues.
Replacing and Finishing the Ground
Once the motor is installed, backfill the hole and replace the ground to its original state. Ensure that the area around the motor is level and secure.
Installation Steps for Hydraulic Gate Motors
Hydraulic gate motors require a few additional steps, but they’re worth it for their power and reliability.
Setting Up the Hydraulic System
Begin by setting up the hydraulic system according to the manufacturer’s instructions. This involves connecting the hydraulic lines and filling the system with fluid.
Installing the Motor and Hydraulic Components
Mount the motor and hydraulic components according to the instructions. Ensure that everything is securely attached and properly aligned.
Wiring and Electrical Connections
Connect the motor to the power supply and ensure that all wiring is secure. Follow the instructions carefully to avoid any electrical issues.
Testing and Adjustments
Test the hydraulic gate motor to ensure it’s operating correctly. Make any necessary adjustments to the system for smooth and reliable operation.
Common Challenges and Troubleshooting
Even with careful installation, you might encounter some challenges. Here are some common issues and how to address them.
Motor Not Responding
If the motor isn’t responding, check the power supply and ensure that all connections are secure. If the issue persists, consult the manufacturer’s troubleshooting guide.
Gate Moving Slowly or Unevenly
If the gate is moving slowly or unevenly, check the alignment of the track and ensure that the motor is properly adjusted. Lubricate any moving parts if necessary.
Electrical Issues
If you’re experiencing electrical issues, double-check all connections and ensure that the motor is properly wired. Consult a professional if you’re unsure how to resolve the problem.
Maintenance Tips for Gate Motors
Regular maintenance is key to keeping your gate motor in top condition. Here are some tips to help you maintain your motor.
Regular Inspections and Cleaning
Inspect your gate motor regularly for any signs of wear and tear. Clean the motor and track to ensure smooth operation.
Lubrication and Adjustment
Lubricate the moving parts of the gate motor to reduce friction and wear. Adjust the motor settings as needed to ensure optimal performance.
Addressing Common Wear and Tear
Replace any worn or damaged parts promptly to avoid further issues. Regular maintenance will help extend the life of your gate motor.
Professional vs. DIY Installation
Deciding whether to install a gate motor yourself or hire a professional depends on your skills and comfort level.
When to Hire a Professional
If you’re unsure about any aspect of the installation process or if you encounter complex issues, it’s best to hire a professional. They have the expertise and tools needed to ensure a successful installation.
DIY Installation Tips and Tricks
If you’re taking on the installation yourself, make sure to follow the manufacturer’s instructions carefully. Take your time and don’t rush the process. Proper planning and preparation will make the installation easier and more successful.
Conclusion
Installing a gate motor can be a straightforward process if you’re well-prepared and informed. From choosing the right motor to handling the installation and maintenance, there’s a lot to consider. By following the tips and steps outlined in this guide, you’ll be well on your way to enjoying the convenience and security of an automated gate.
If you’re ready to enhance your home’s security with a new gate motor, check out our Gate Motor Installation page for more information and professional assistance.